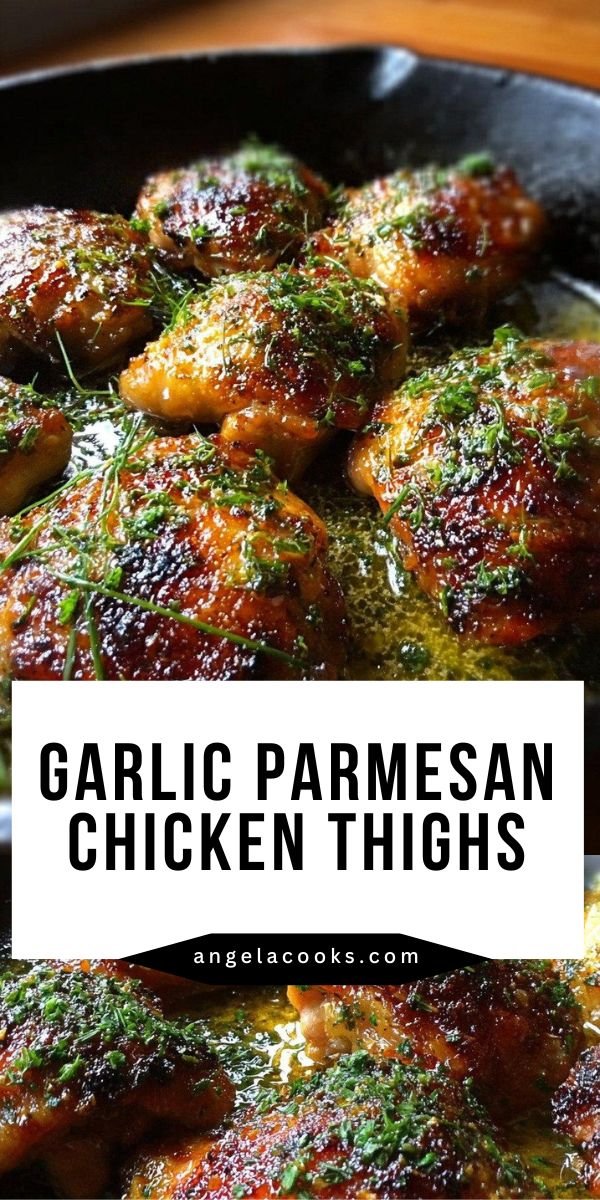
1) What I Learned Testing Garlic Parmesan Chicken Thighs
Dry chicken skin can ruin dinner before the first bite. I’m Angela, and my early garlic parmesan chicken thighs had good flavor, but the topping browned too fast while the skin stayed soft. After testing the timing, I discovered the fix was simple: sear the thighs first, move the garlic in later, and let the oven finish the meat gently. That small adjustment turned baked garlic parmesan chicken thighs into the kind of calm, dependable family dinner I want on a busy night: crisp skin, juicy meat, buttery garlic aroma, and a savory Parmesan finish that feels careful without feeling fussy.
Table of Contents
- 1) What I Learned Testing Garlic Parmesan Chicken Thighs
- 2) Key Takeaways
- 3) Easy Garlic Parmesan Chicken Thighs Recipe
- 4) Why Most Garlic Parmesan Chicken Thighs Recipes Fail
- 5) Ingredients for Garlic Parmesan Chicken Thighs
- 6) How to Make Garlic Parmesan Chicken Thighs
- 7) Recipe Card: Garlic Parmesan Chicken Thighs
- 8) Tips for Making Garlic Parmesan Chicken Thighs
- 9) Common Mistakes & Fixes
- 10) How to Tell Garlic Parmesan Chicken Thighs Are Done
- 11) Professional Secrets Behind Better Garlic Parmesan Chicken Thighs
- 12) Best Dishes or Pairings to Serve With Garlic Parmesan Chicken Thighs
- 13) Making Garlic Parmesan Chicken Thighs Ahead of Time
- 14) Storing Leftover Garlic Parmesan Chicken Thighs
- 15) FAQ (Real Cooking Questions)
- 16) Save This Garlic Parmesan Chicken Thighs Recipe
- 17) Conclusion
- 18) Nutrition
2) Key Takeaways
- Dry the skin before seasoning: Moisture on chicken skin creates steam, which blocks browning and leaves the surface soft.
- Sear before adding garlic: Garlic burns quickly over high heat, so the chicken needs its crust before the garlic butter goes into the pan.
- Use the oven as the finishing step: The skillet builds flavor, while the oven cooks the thighs through without over-browning the Parmesan topping.
- Rest before serving: A short rest keeps the meat juicy and lets the garlic butter settle around the chicken instead of running out on the plate.
3) Easy Garlic Parmesan Chicken Thighs Recipe
These garlic parmesan chicken thighs work because the cooking method separates three jobs that often get rushed into one step: browning the skin, blooming the garlic, and finishing the chicken to a safe internal temperature. The first sear gives the skin a deep golden crust. Lowering the heat before adding garlic protects the sauce from bitterness. The oven then finishes the thighs evenly, so the Parmesan topping melts and lightly browns while the meat stays moist near the bone.
The goal is not just “cooked chicken.” The goal is a contrast: crisp skin on top, juicy meat underneath, and a buttery garlic-Parmesan layer that clings instead of sliding off. This is why bone-in, skin-on thighs are especially useful here. They are more forgiving than lean chicken breast, but they still need careful heat control to avoid rubbery skin or dry edges.
4) Why Most Garlic Parmesan Chicken Thighs Recipes Fail
The skin stays soft because the chicken is wet: Chicken thighs often hold surface moisture from packaging. If that moisture is not blotted away, the skillet spends the first few minutes evaporating water instead of browning skin. The fix is to pat every thigh dry before seasoning.
The garlic turns bitter because it hits high heat too early: Garlic is delicate. If it cooks in the skillet during the hard sear, it can darken before the chicken is ready. This method waits until after searing, lowers the heat, and cooks the garlic briefly in butter until fragrant.
The Parmesan topping scorches instead of melting: Parmesan has low moisture and can brown quickly. Adding it before the skillet sear can create a burnt, salty crust. Sprinkling it over the chicken just before baking gives it enough oven heat to melt and turn lightly golden.
The meat dries out because doneness is guessed: Color is not a reliable doneness test for chicken thighs. The safest and most consistent checkpoint is 165°F in the thickest part, avoiding the bone. Pulling the skillet at the right temperature keeps the texture juicy.
The flavor tastes flat because seasoning is too timid: Chicken thighs need salt on both sides before cooking. Parmesan adds saltiness later, but it cannot fully season the meat from the inside. Seasoning early builds a better base layer of flavor.
5) Ingredients for Garlic Parmesan Chicken Thighs
Bone-in, skin-on chicken thighs: These are the foundation of the recipe because the skin crisps during searing and the bone helps the meat cook with more moisture. Use them when you want juicy garlic parmesan chicken thighs with a crisp top. If replaced with boneless thighs, the cooking time will be shorter and the skin effect will change.
Unsalted butter: Butter carries the garlic flavor and helps create the rich pan sauce. It is divided because some is used during searing and the rest is saved for the garlic butter stage. Salted butter can work, but you need to reduce added salt because Parmesan also brings salinity.
Olive oil: Olive oil raises the searing flexibility of the fat mixture and helps the butter brown without scorching too quickly. Add it before the chicken goes in. If you use only butter, the milk solids can darken faster during the sear.
Garlic: Minced garlic gives the recipe its deep savory aroma. Add it only after lowering the heat so it blooms in butter without burning. If the garlic turns dark brown, the sauce can taste sharp and bitter.
Freshly grated Parmesan cheese: Fresh Parmesan melts and clings better than many pre-shredded versions. It creates the savory topping for parmesan garlic chicken thighs. If replaced with a powdery shelf-stable cheese, the topping may taste saltier and less creamy.
Italian seasoning: This adds dried herb flavor without needing several separate jars. It works best mixed with the Parmesan before baking so the herbs distribute evenly across the thighs.
Paprika: Paprika supports color and adds gentle warmth. Smoked paprika gives a deeper, slightly smoky flavor, while sweet paprika keeps the taste milder. Use either depending on the flavor direction you want.
Red pepper flakes: This optional ingredient adds a small amount of heat. Add it to the Parmesan mixture if you want a warmer finish, or leave it out for a gentler family-style dinner.
Fresh parsley: Parsley is added at the end because fresh herbs lose brightness under long heat. It cuts through the richness of the butter and Parmesan while adding color to the finished skillet.
Kosher salt and freshly ground black pepper: Salt seasons the chicken before browning, and black pepper adds a clean savory edge. Use them before cooking, not only at the end, so the meat itself has flavor.
- Bone-in thighs vs boneless thighs: Bone-in thighs take longer but stay juicier and give a better skillet-to-oven texture; boneless thighs cook faster and need closer temperature checks.
- Fresh Parmesan vs pre-shredded Parmesan: Freshly grated Parmesan melts more smoothly and adheres better, while pre-shredded cheese can stay drier because of anti-caking starches.
- Garlic added early vs garlic added later: Early garlic can burn during searing, but later garlic blooms gently in butter and keeps the sauce aromatic.
- Oven finish vs stovetop-only cooking: The oven finish cooks the chicken more evenly and protects the Parmesan topping from direct skillet heat.

6) How to Make Garlic Parmesan Chicken Thighs
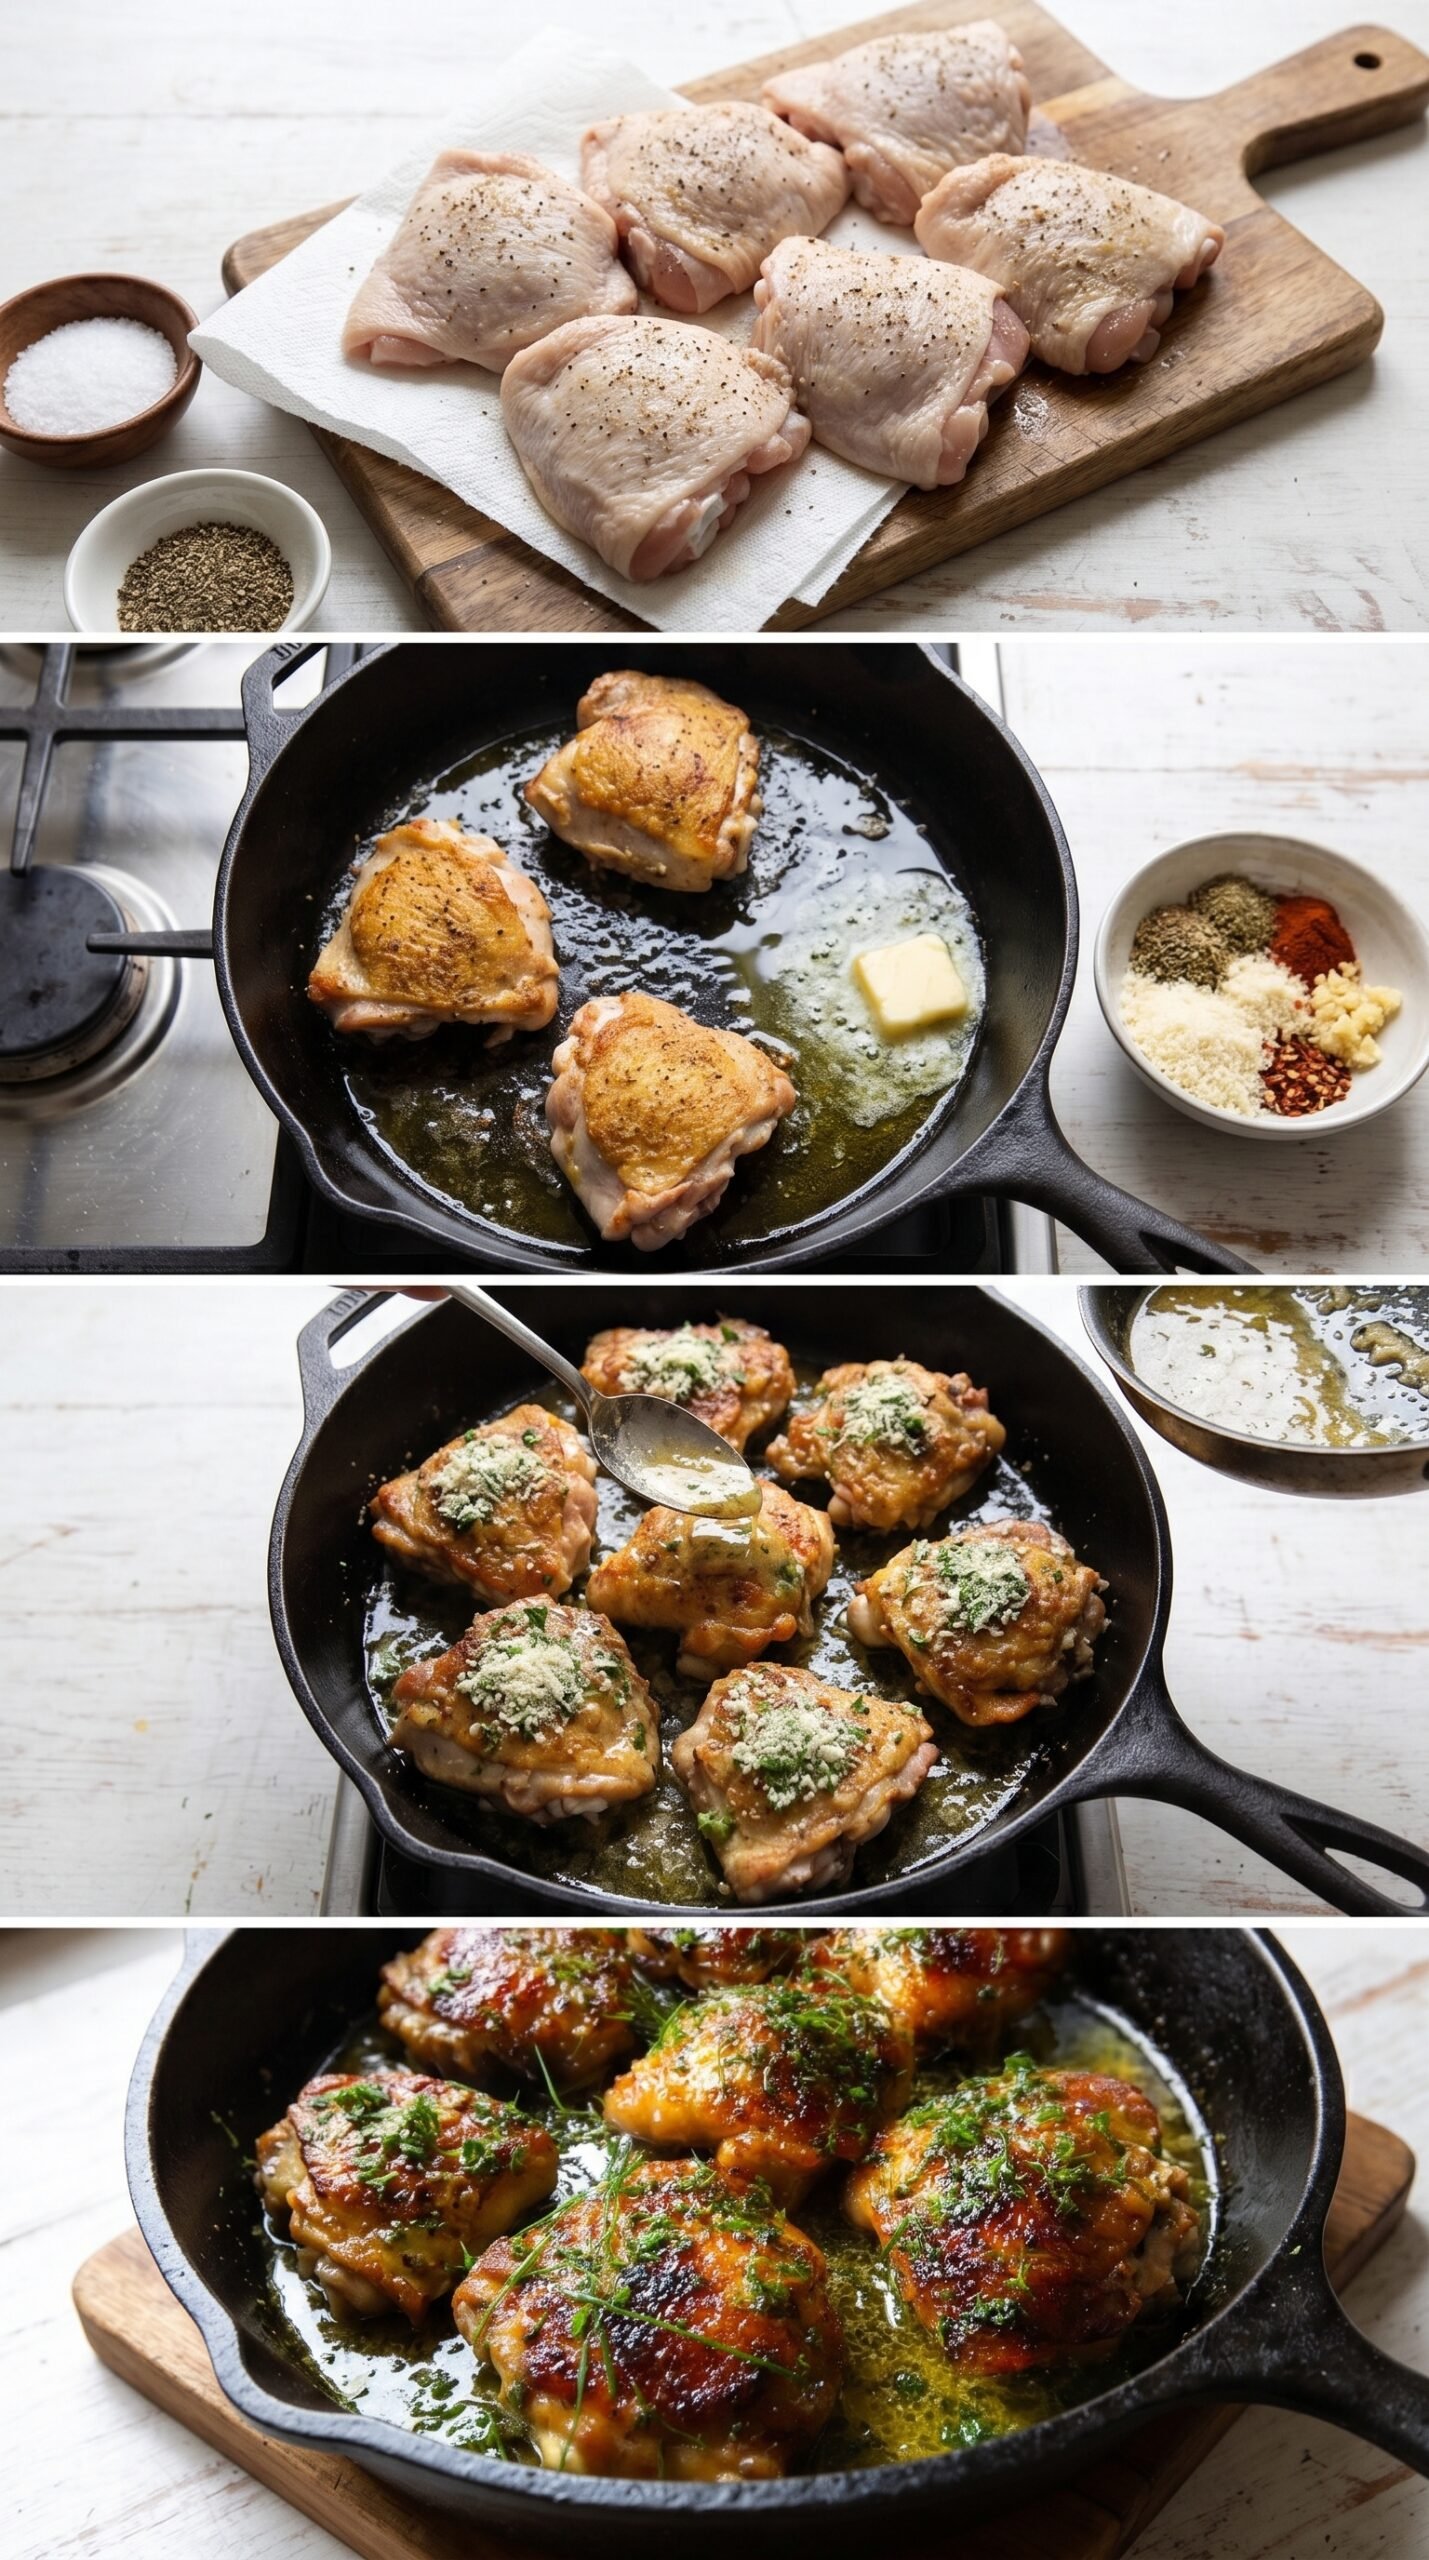
Step 1: Preheat the oven to 400°F and dry the chicken thighs thoroughly with paper towels. Season both sides with kosher salt and black pepper. The chicken should look matte, not wet, before it touches the skillet.
Step 2: Heat an oven-safe skillet over medium-high heat with olive oil and part of the butter. Place the thighs skin-side down and leave them undisturbed for 6 to 8 minutes. The sound should be a steady sizzle, not a harsh crackle, and the skin should turn deep golden before flipping.
Step 3: While the chicken sears, mix the Parmesan, Italian seasoning, paprika, and optional red pepper flakes. Having this ready prevents rushing later, especially once the garlic butter is fragrant.
Step 4: Flip the chicken and sear the second side briefly for 2 to 3 minutes. Remove the thighs to a plate, then lower the heat before adding the remaining butter and minced garlic. Stir for about 60 seconds, just until the garlic smells sweet and savory.
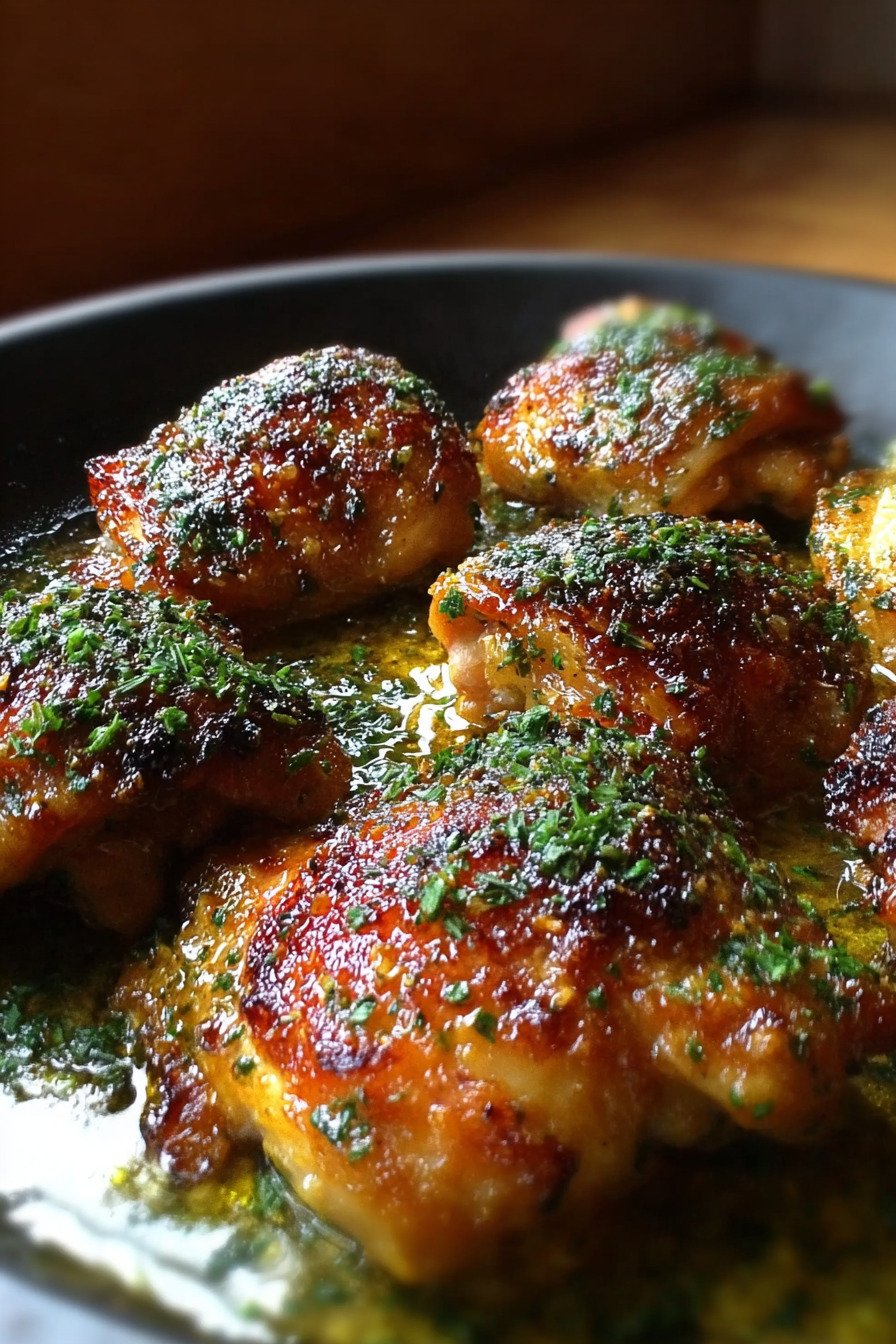
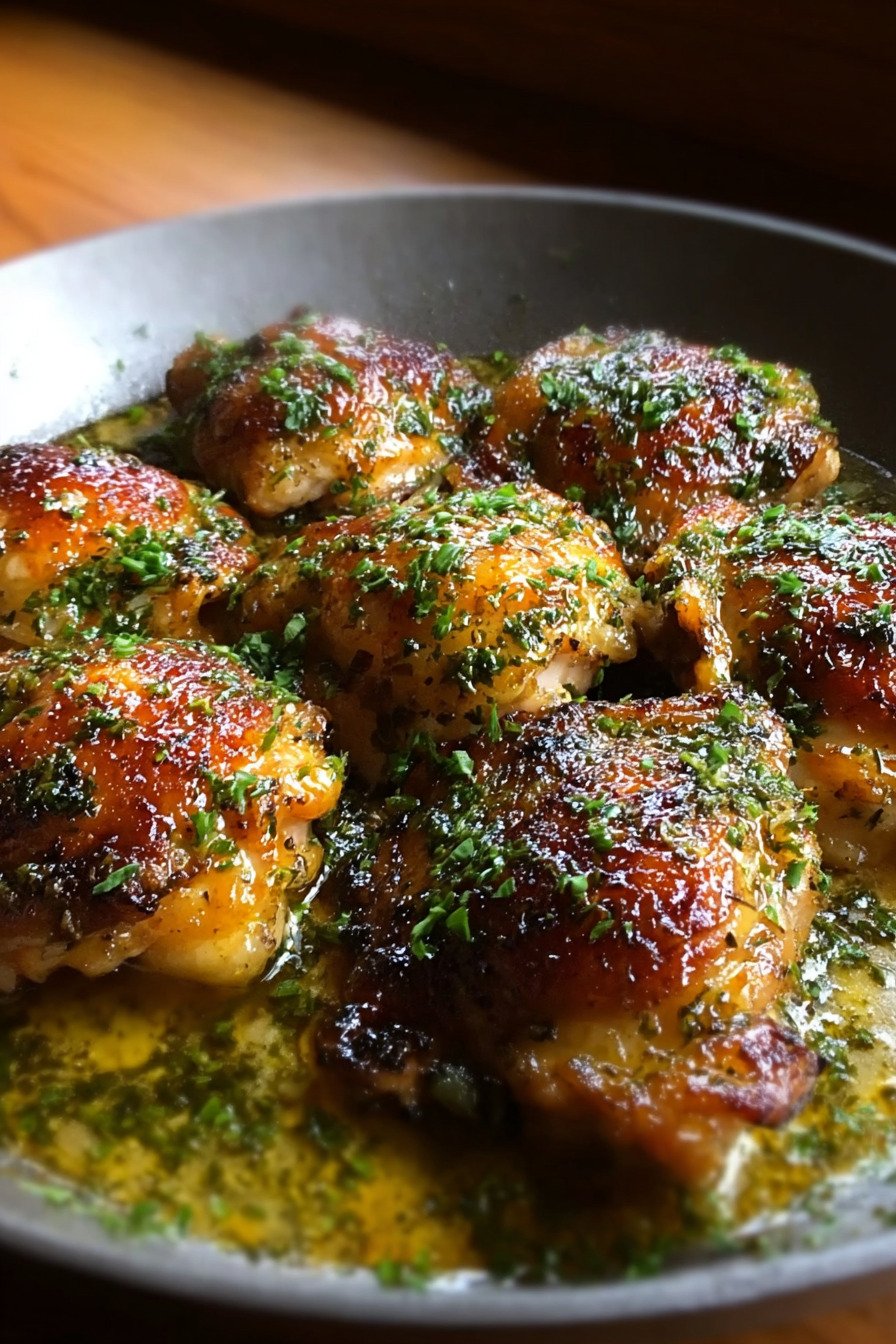
Step 5: Return the thighs skin-side up, spoon garlic butter over the top, and press the Parmesan mixture onto each piece. Bake until the thickest part reaches 165°F without touching the bone. Rest for about 5 minutes, then finish with parsley.
7) Recipe Card: Garlic Parmesan Chicken Thighs
Garlic Parmesan Chicken Thighs With Crispy Skin
Ingredients
- 8 bone-in, skin-on chicken thighs (about 1.5–2 lbs total), patted very dry so the skin can brown instead of steam
- 4 tbsp unsalted butter (divided), used for searing richness and the garlic butter base
- 2 tbsp olive oil, to help the butter sear without scorching too quickly
- 6 large cloves garlic (minced), added after searing so it stays fragrant instead of bitter
- 1/2 cup freshly grated Parmesan cheese, finely grated so it melts and clings to the chicken
- 1 tsp Italian seasoning, for a balanced herb flavor in the crust
- 1/2 tsp paprika (smoked or sweet), for color and gentle warmth
- 1/4 tsp red pepper flakes (optional, for a little heat), use less for a milder finish
- 1/4 cup fresh parsley (chopped), added at the end for freshness
- to taste kosher salt and freshly ground black pepper, used generously because chicken thighs need seasoning on both sides
Instructions
- Preheat the oven to 400°F (200°C). Pat the chicken thighs completely dry with paper towels, especially over the skin, then season both sides generously with kosher salt and freshly ground black pepper. Dry skin is the first checkpoint for a crisp finish.
- Set an oven-safe skillet over medium-high heat. Add the olive oil and 2 tablespoons of the butter. When the butter melts and the foaming settles, place the chicken thighs skin-side down in the skillet. Let them sear undisturbed for 6–8 minutes, until the skin is deeply golden and releases more easily from the pan.
- While the chicken sears, stir together the freshly grated Parmesan cheese, Italian seasoning, paprika, and optional red pepper flakes in a small bowl. Keep the minced garlic ready nearby so it can be added quickly once the heat is lowered.
- Flip the chicken thighs with tongs and sear the second side for 2–3 minutes, just until lightly colored. Transfer the chicken to a plate. The chicken will not be cooked through yet; the oven will finish it gently.
- Reduce the heat to medium-low and add the remaining 2 tablespoons of butter to the skillet. Once melted, add the minced garlic and cook for about 60 seconds, stirring constantly, until fragrant. Do not let the garlic darken, because burnt garlic can make the sauce taste bitter.
- Return the chicken thighs to the skillet skin-side up. Spoon some of the garlic butter over each piece, then sprinkle the Parmesan herb mixture evenly over the tops. Press the topping lightly so it adheres without covering the crispy skin too heavily.
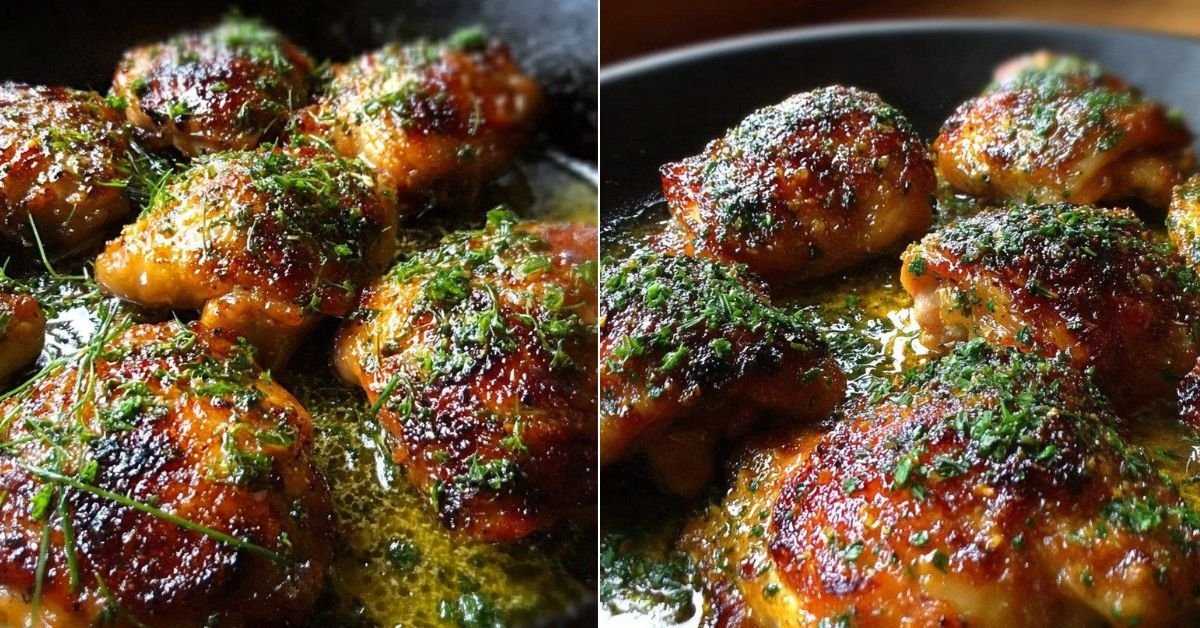
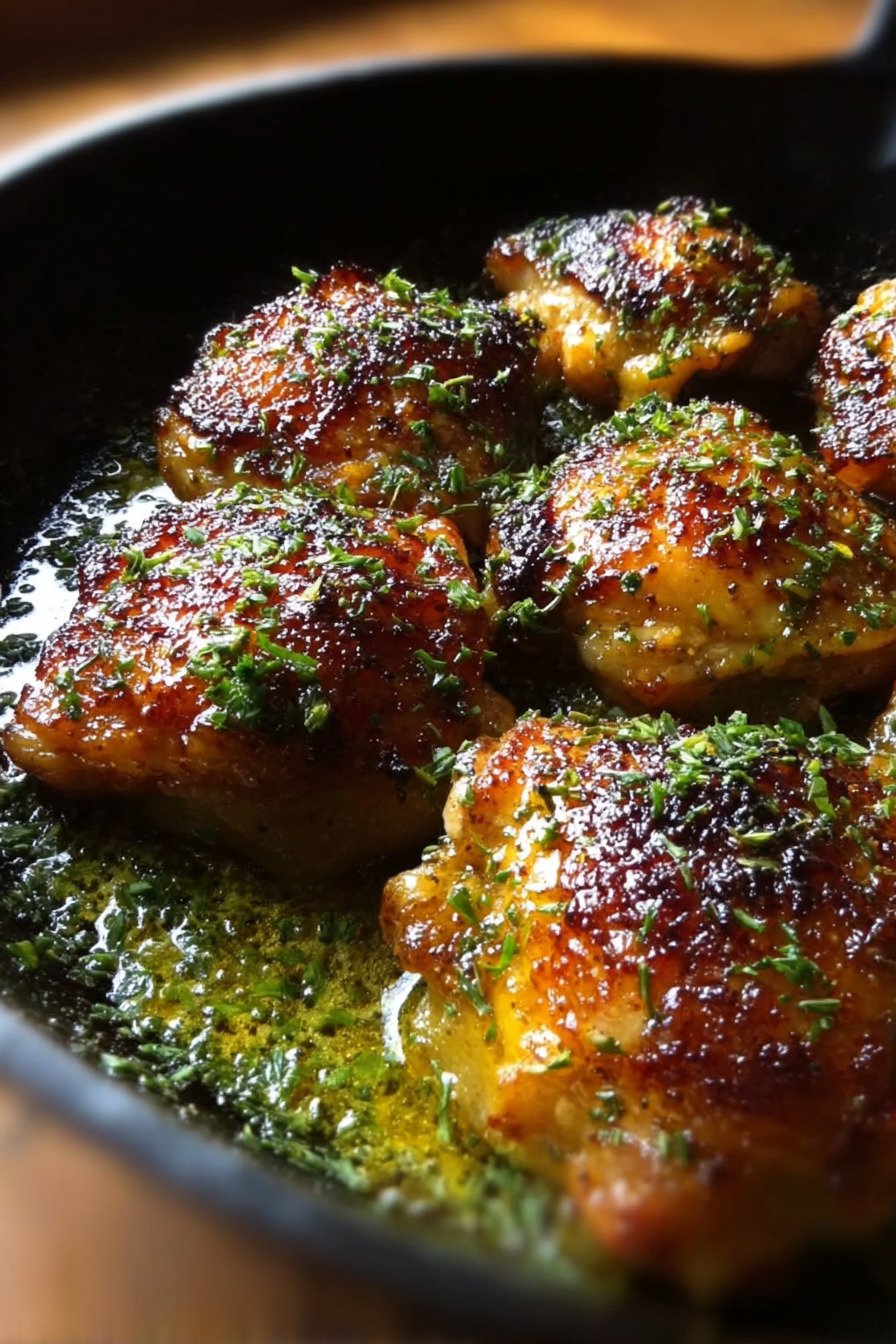
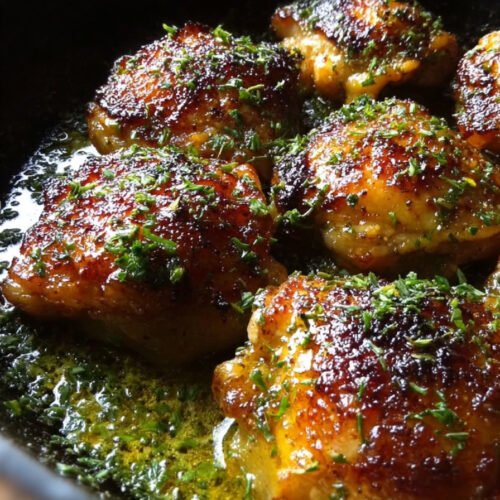
- Transfer the skillet to the preheated oven and bake for 15–18 minutes, or until the chicken reaches 165°F (74°C) on an instant-read thermometer inserted into the thickest part without touching the bone. The Parmesan should look melted, lightly golden, and savory around the edges.
- Remove the skillet from the oven and remember that the handle will be extremely hot. Let the chicken rest in the pan for about 5 minutes so the juices settle back into the meat. Sprinkle with chopped parsley just before serving.
8) Tips for Making Garlic Parmesan Chicken Thighs
Use a skillet large enough to keep the thighs from crowding. Crowding traps steam, and steam softens skin. If your skillet is small, sear in batches and return all the chicken to the pan before baking. The best visual cue during searing is a deep golden skin that releases with gentle pressure from tongs.
Keep the garlic stage short and controlled. After the sear, the skillet is already hot, so medium-low heat is enough to perfume the butter. If the garlic starts turning dark quickly, pull the pan off the heat for a few seconds and stir. The aroma should be rounded and savory, not sharp or burnt.
For parmesan crusted chicken thighs, press the Parmesan mixture gently onto the skin but do not pack it into a thick paste. A heavy layer can turn greasy or slide off. A lighter, even coating melts better and lets the browned skin stay noticeable underneath.
9) Common Mistakes & Fixes
Problem: The skin is pale and rubbery. Cause: The chicken was wet or moved too soon during searing. Fix: Pat the thighs dry, preheat the skillet properly, and let the skin-side sear undisturbed until golden.
Problem: The garlic tastes bitter. Cause: The garlic cooked over high heat or stayed in the skillet too long. Fix: Add garlic only after reducing the heat and cook it for about 60 seconds, stirring constantly.
Problem: The Parmesan topping burns. Cause: The cheese was exposed to direct high skillet heat too early. Fix: Add the Parmesan mixture after the initial sear and let the oven melt it gently.
Problem: The chicken looks done outside but is undercooked inside. Cause: Bone-in thighs need oven time after browning. Fix: Use an instant-read thermometer and check the thickest part without touching bone.
Problem: The finished chicken tastes flat. Cause: Only the topping was seasoned. Fix: Salt and pepper both sides of the chicken before searing so the meat has flavor beneath the crust.
10) How to Tell Garlic Parmesan Chicken Thighs Are Done
Garlic parmesan chicken thighs are done when the thickest part of the meat reaches 165°F and the juices look clear. The skin should look crisp around the edges, the Parmesan should be melted and lightly golden, and the garlic butter should smell savory rather than harsh. When you press the meat gently with tongs, it should feel firm but not tight or dry. Failure signs include pale skin, blackened garlic bits, a topping that looks scorched instead of golden, or juices that remain pink near the bone.
11) Professional Secrets Behind Better Garlic Parmesan Chicken Thighs
The first professional habit is separating browning from flavor building. Restaurants often sear protein first because high heat creates surface flavor quickly, but delicate aromatics like garlic are added later. That same logic makes this home method more reliable.
The second secret is using residual skillet heat wisely. Once the chicken has browned, the pan is already carrying concentrated flavor from butter, oil, chicken fat, and browned bits. Adding butter and garlic at a lower temperature turns that flavor into a sauce instead of burning it away.
The third secret is resting the meat. Chicken thighs are forgiving, but they still benefit from a pause after baking. Resting lets the juices settle, which makes each bite taste fuller and keeps the garlic-Parmesan topping from sliding off immediately when served.
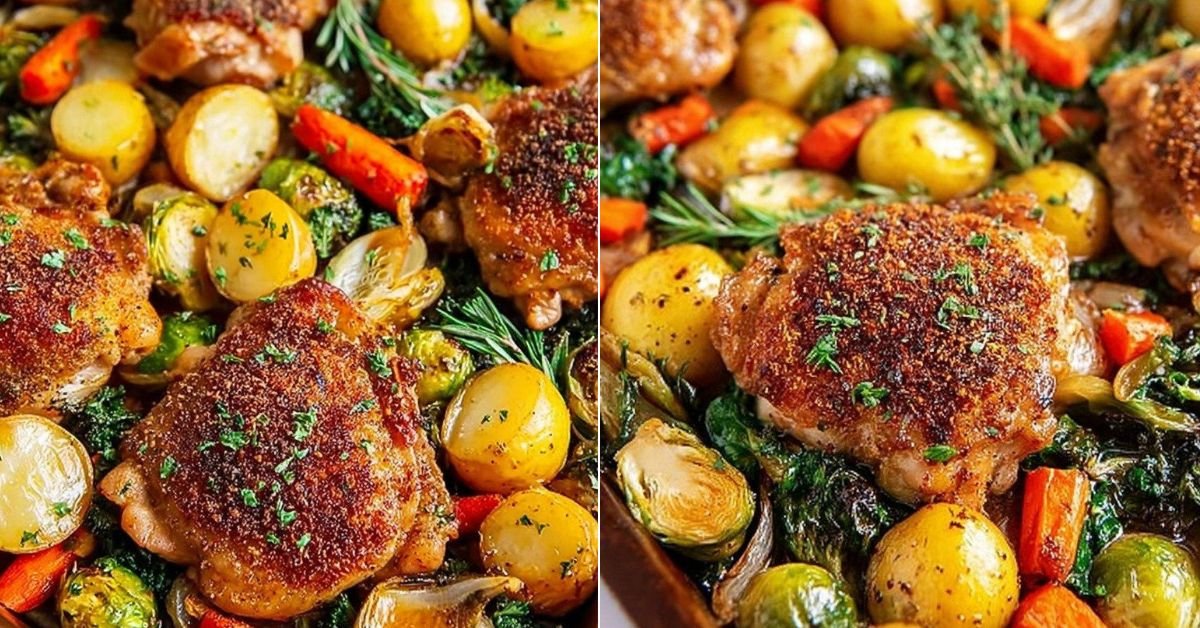
12) Best Dishes or Pairings to Serve With Garlic Parmesan Chicken Thighs
Serve garlic parmesan chicken thighs with sides that can catch the garlic butter without competing with the Parmesan. Mashed potatoes, roasted baby potatoes, buttered rice, or creamy polenta all work well because they absorb the pan juices. For a lighter plate, add roasted broccoli, green beans, asparagus, or a crisp salad with lemony dressing.
If you want a comfort-style dinner, pair the chicken with garlic bread and a simple vegetable. If you want a fresher meal, use a cucumber salad, tomato salad, or sautéed greens. The rich chicken benefits from something bright, crunchy, or lightly acidic on the side.

13) Making Garlic Parmesan Chicken Thighs Ahead of Time
You can season the chicken several hours ahead and refrigerate it uncovered on a plate or tray. This helps the surface dry, which improves browning. Keep the Parmesan mixture separate until cooking so it stays dry and easy to sprinkle. Mince the garlic shortly before cooking if possible, because fresh garlic has the cleanest aroma.
For a dinner-prep shortcut, measure the Parmesan, seasoning, paprika, and red pepper flakes into a small covered container. When it is time to cook, you only need to sear the chicken, bloom the garlic, top the thighs, and bake. This makes the recipe practical for easy weeknight chicken thighs without sacrificing texture.
14) Storing Leftover Garlic Parmesan Chicken Thighs
Store leftover garlic parmesan chicken thighs in an airtight container in the refrigerator for up to 3 days. Let the chicken cool before covering it, but do not leave it at room temperature for an extended period. The skin will soften in the refrigerator, which is normal because moisture collects during storage.
Reheat leftovers in a 350°F oven until warmed through. An air fryer can also help restore some crispness. The microwave works for speed, but it softens the skin and can make the Parmesan topping less defined. Leftover meat can be sliced and served over salad, rice bowls, wraps, or pasta.
15) FAQ (Real Cooking Questions)
Can I make this with boneless chicken thighs? Yes, but boneless thighs cook faster. If you are adapting this toward chicken thighs in the oven boneless, start checking the temperature earlier and expect less dramatic crispy skin if the thighs are skinless.
Can I use pre-shredded Parmesan? You can, but freshly grated Parmesan gives a better melt and a more even topping. Pre-shredded Parmesan often contains anti-caking ingredients that can make the crust drier.
Why did my garlic burn? The skillet was probably too hot when the garlic was added. Garlic should go in after the chicken is removed and the heat is reduced. Stir constantly and stop when it smells fragrant.
Can I make this as pan seared chicken thighs boneless? You can use the same garlic-Parmesan flavor idea, but boneless thighs need less oven time or may finish on the stovetop depending on thickness. Always check the internal temperature.
How do I keep the chicken juicy? Do not skip the thermometer or the resting time. Bake just until the thickest part reaches 165°F, then rest the chicken for about 5 minutes before serving.
16) Save This Garlic Parmesan Chicken Thighs Recipe
If this Garlic Parmesan Chicken Thighs recipe helped you solve dry meat, soft skin, or burnt garlic, save it for your next family dinner. The key reminder is: dry the chicken well, sear before adding garlic, and let the oven finish the thighs until juicy and golden.
17) Conclusion
Great garlic parmesan chicken thighs are not about adding more ingredients; they are about using the right timing. Dry skin, a patient sear, gentle garlic heat, a light Parmesan topping, and a short rest turn a simple skillet dinner into a confident, repeatable method. Once you understand why each step matters, the recipe becomes easier to control: crisp where it should be crisp, juicy where it should be juicy, and rich with garlic-Parmesan flavor without tasting heavy or burnt.
18) Nutrition
Serving Size 1 portion Calories 620 Sugar 1 g Sodium 610 mg Fat 46 g Saturated Fat 18 g Carbohydrates 3 g Fiber 0 g Protein 46 g Cholesterol 205 mg


Leave a Comment